Day 18 Task: Docker for DevOps Engineers
Hii I am a backend/DevOps engineer.I have a experience with development and automation.I mostly work with Python, django, Cloud based technologies.
🔹What is Yaml?
YAML, which stands for "YAML Ain't Markup Language" (a recursive acronym), is a data serialization language commonly used for creating configuration files. It is designed to be human-readable and straightforward to understand.
YAML is particularly favored for its simplicity and readability, making it a popular choice for configuration files in various applications and programming languages. It is not a traditional markup language like HTML or XML; rather, it focuses on representing structured data in a more natural and human-friendly way.
YAML files typically use the .yml or .yaml file extension and are often employed to configure settings, parameters, and options in software applications, deployment scripts, and other contexts where structured data needs to be defined.
here's a simple example of a YAML configuration file that defines some basic settings for a web application:
# web_app_config.yml

app_name: MyWebApp
version: 1.0.0
debug_mode: true

database:
  type: PostgreSQL
  host: localhost
  port: 5432
  username: myuser
  password: mypassword
  database_name: mydb

server:
  host: 0.0.0.0
  port: 8000
In this example, we have defined configuration settings for a web application. The YAML file is organized into key-value pairs and nested structures. Here's what each section means:
app_name,version, anddebug_modeare basic settings for the web application.databasesection provides settings for the database connection.serversection defines server settings for the application to listen on.
YAML's indentation is used to indicate the nesting of data. It's important to maintain consistent indentation for the file to be parsed correctly.
Please note that this is a simplified example, and YAML can be used to represent more complex configurations in a similar readable and structured manner.
🔹Docker Compose
Docker Compose is another best tool for docker to setup multi-container environments. Using this create a single compose file with defining all the containers with there environments. You can easily use single command to build images and run all the containers.
There is the three-step process to work with Docker Compose.
1. Define application environment with Dockerfile for all services.
2. Create a docker-compose.yml file defining with all services under application.
3. Run docker-compose up to run all services under applications.
You must have Docker Engine installed on your system. If you don’t have already installed, Visit our Docker installation section of this tutorial.
🔹Docker Installation
On Ubuntu (using apt): -Update the apt package index and install packages to allow apt to use a repository over HTTPS:
sudo apt-get update
sudo apt-get install ca-certificates curl gnupg
Add Docker’s official GPG key:
sudo install -m 0755 -d /etc/apt/keyrings
curl -fsSL https://download.docker.com/linux/ubuntu/gpg | sudo gpg --dearmor -o /etc/apt/keyrings/docker.gpg
sudo chmod a+r /etc/apt/keyrings/docker.gpg
Use the following command to set up the repository:
echo \
  "deb [arch="$(dpkg --print-architecture)" signed-by=/etc/apt/keyrings/docker.gpg] https://download.docker.com/linux/ubuntu \
  "$(. /etc/os-release && echo "$VERSION_CODENAME")" stable" | \
  sudo tee /etc/apt/sources.list.d/docker.list > /dev/null
Update the apt package index:
sudo apt-get update
Install Docker Engine, containerd, and Docker Compose.
sudo apt-get install docker-ce docker-ce-cli containerd.io docker-buildx-plugin docker-compose-plugin
Verify that the Docker Engine installation is successful by running the hello-world image.
sudo systemctl enable docker
sudo systemctl status docker
sudo usermod -aG docker $USER
sudo reboot
🔹Install Docker Compose
sudo apt update
sudo apt install docker-compose
🔹Docker Compose Example File
docker pull gopalgtm001/django-auth:latest
version: '3.9'

services:
  web:
    image: gopalgtm001/django-auth:latest
    command: bash -c "python3 manage.py makemigrations
            && python3 manage.py migrate
            && python3 manage.py runserver 0.0.0.0:8000"
    ports:
      - "8000:8000"
    environment:
      - DB_USER=django_user
      - DB_PASSWORD=django_pass
      - DB_NAME=django_db
    depends_on:
      - db

  db:
    image: postgres:15
    volumes:
      - db_data:/var/lib/postgresql/data/
    environment:
      - POSTGRES_USER=django_user
      - POSTGRES_PASSWORD=django_pass
      - POSTGRES_DB=django_db

volumes:
  db_data:
In this Docker Compose YAML file:
Version Declaration:
version: '3.9': This specifies the version of the Docker Compose syntax being used. In this case, version 3.9 is being used.
Services:
- The
servicessection defines the containers or services that make up your application.
- The
Web Service:
The
webservice is defined:image: gopalgtm001/django-auth:latest: This specifies the Docker image to use for this service. The imagegopalgtm001/django-auth:latestwill be used.command: This is the command to run when the container starts. In this case, it's running a bash command that performs migrations, applies database migrations, and starts the Django server.ports: Maps a port from the host machine to a port on the container. In this case, it maps port 8000 on the host to port 8000 on the container.environment: Specifies environment variables for the container. It sets the database user, password, and name for the Django application.depends_on: Specifies that this service depends on thedbservice.
DB Service:
The
dbservice is defined:image: postgres:15: This specifies the PostgreSQL database image to use for this service.volumes: Creates a named volume calleddb_datathat is mounted to the/var/lib/postgresql/data/directory inside the container. This ensures data persistence for the database.environment: Sets environment variables for the PostgreSQL container, including the user, password, and database name.
Volumes:
- The
volumessection defines named volumes that can be used by the services. Here, it defines thedb_datavolume which is used by thedbservice to store PostgreSQL data.
- The
Run And build Image:
docker-compose up --build
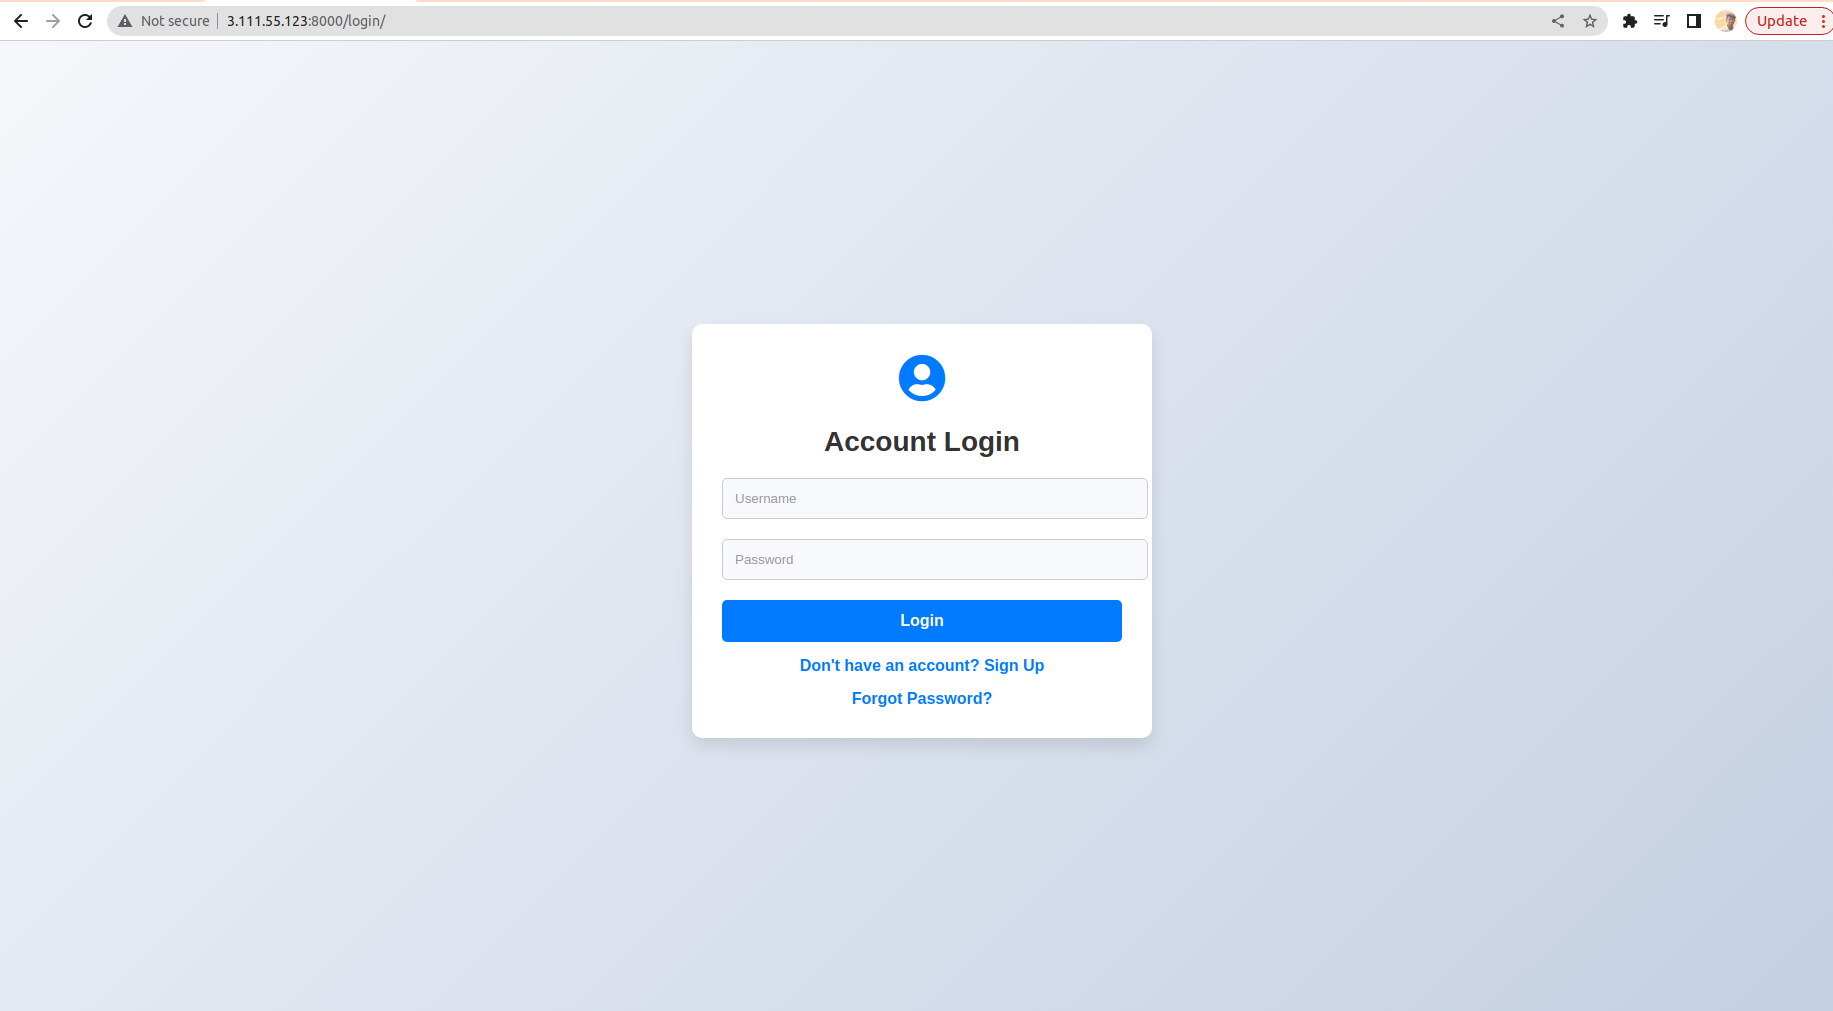
Access Django Application: Open a web browser and enter http://publicip:8000 to access your Django application running inside the Docker container.
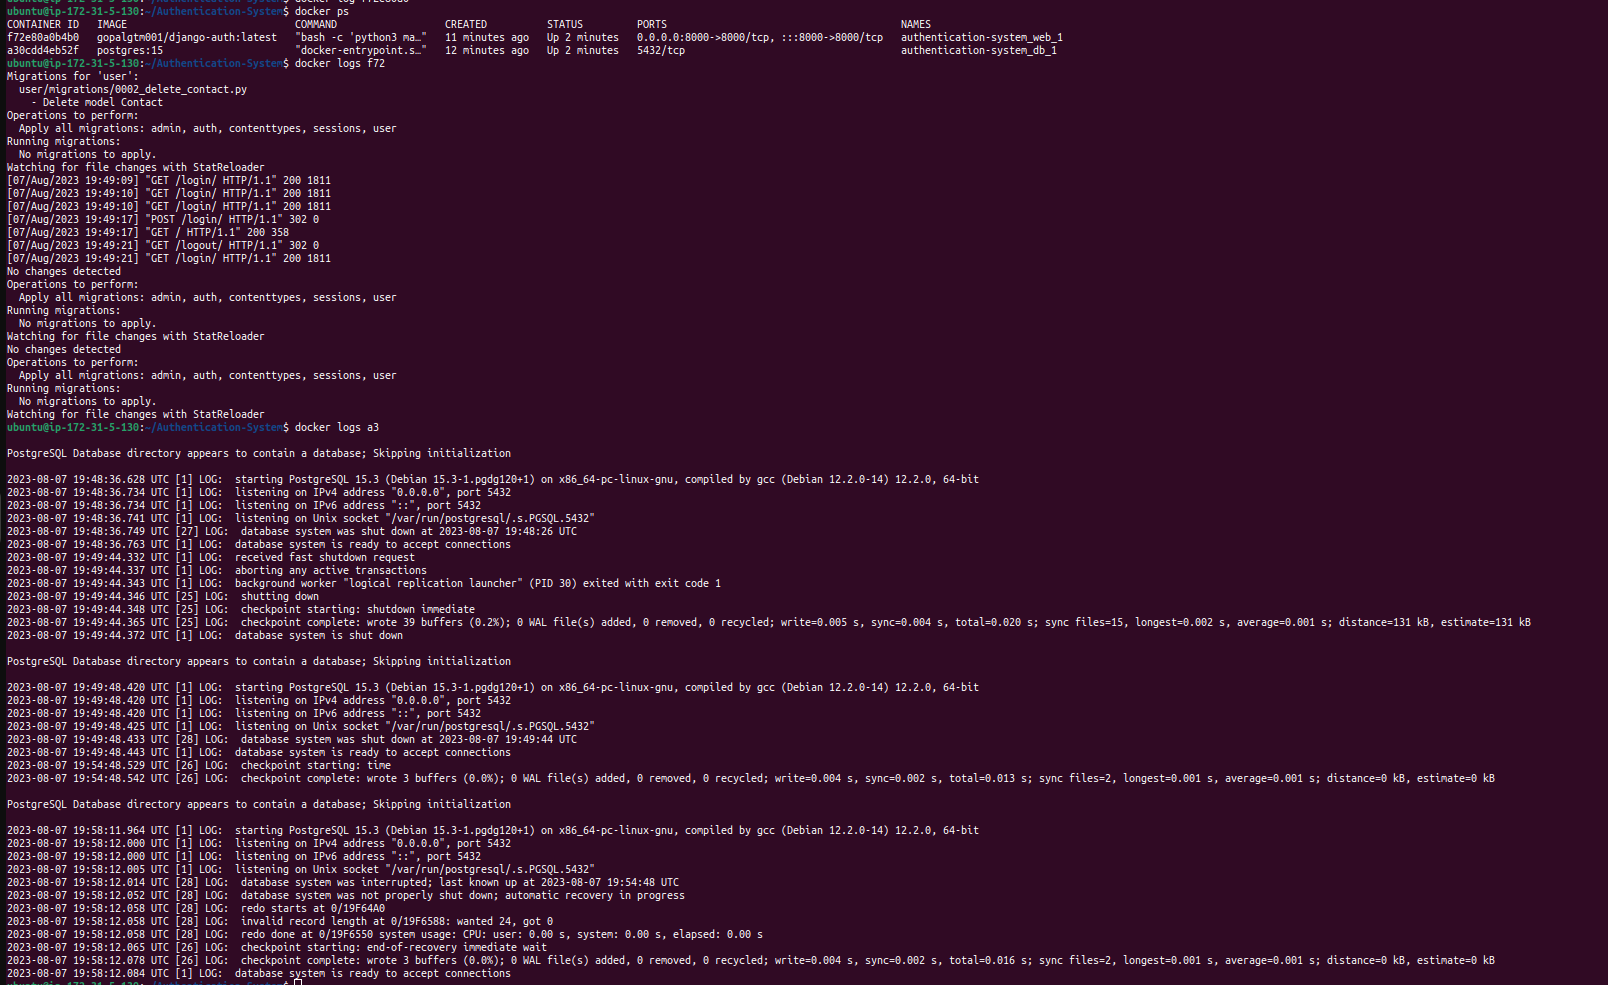
Inspect Running Container:
docker inspect container_id

View Container Logs:
docker logs container_id
Stop and Start Container:
docker stop mynginx
docker start mynginx
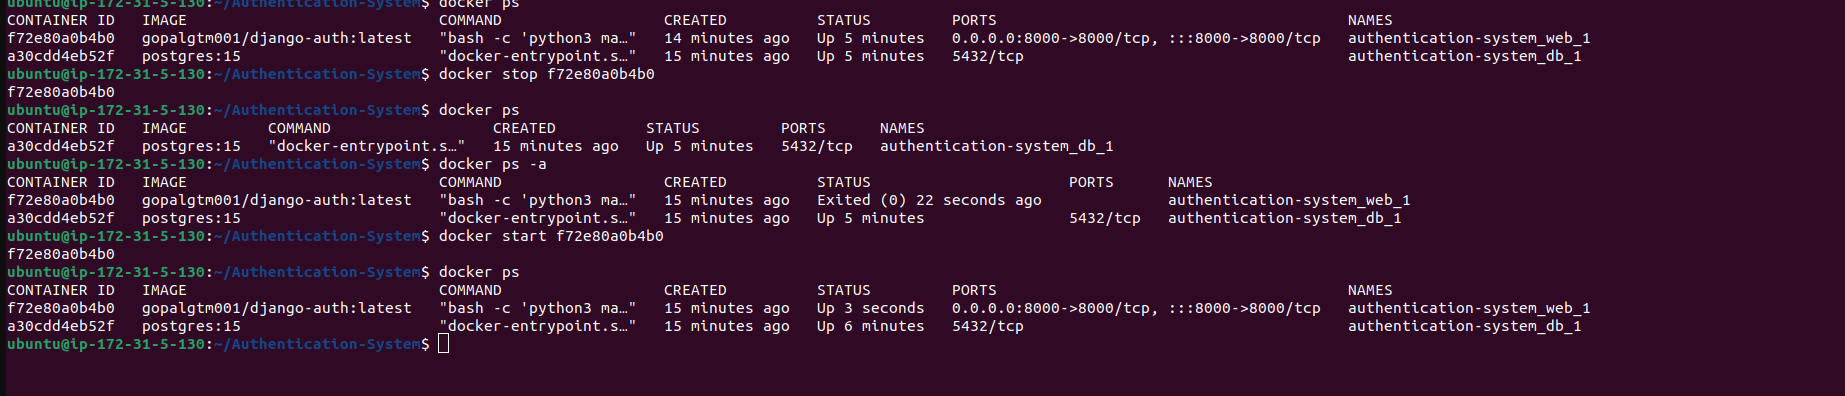
Remove Container:
docker rm container_id


